Using Sphinx To Generate Documentation From Python DocStrig
Sphinx is python recommended tool for generating documentation for python projects, it can generate the documentation of the project in various popular formats, like pdf, epub, latex, html, using readthedocs.io and github, even publishing the documentation has been made easy. For more about Sphinx, please follow Sphinx master page
Now let us see, how we can make use of Sphinx to document our project.
Sphinx by default uses ReStructuredText as a markup language, which is great. ReStructuredText will look familiar to you, if you have been using the docstring in your python code.
:param path: The path of the file to wrap
:type path: str
:param field_storage: The :class:`FileStorage` instance to wrap
:type field_storage: FileStorage
:param temporary: Whether or not to delete the file when the File
   instance is destructed
:type temporary: bool
:returns: A buffered writable file descriptor
:rtype: BufferedFileStorage
[1]
Shinix using the docutils [2] can parse the ReStructuredText and generates the documentation. It can generate documentation in a function level, Class level and also in module/modules at once. Before we go much further, let us see two popular Python Docstring Style, namely Google style and Numpy style.
1. Google Style
def func(arg1, arg2):
    """Summary line.

    Extended description of function.

    Args:
        arg1 (int): Description of arg1
        arg2 (str): Description of arg2

    Returns:
        bool: Description of return value

    """
    return True
[3] This is a google style docstring, which looks more readable than the ReStructuredText. Let us see Numpy Style docstring as well.
2. Numpy Style
def func(arg1, arg2):
    """Summary line.

    Extended description of function.

    Parameters
    ----------
    arg1 : int
        Description of arg1
    arg2 : str
        Description of arg2

    Returns
    -------
    bool
        Description of return value

    """
    return True
Doesn’t looks much different except they have been formatted differently. Hence let us now stick with any one of them and see how we can generate the documentation.
Installing Sphinx
pip3 install sphinx
Assuming that you’ve pip installed already. You can ofcourse follow other installation approach like apt-get install python3-sphinx and others depending upon your system’s specification. Please refer to this installation guide
Install Napoleon Extension
pip3 install sphinxcontrib-napoleon
Napoleon extension converts the Google & Numpy style docstrings into the ReStructuredText so that Sphinx can parse them.
I have a project folder structure like this:
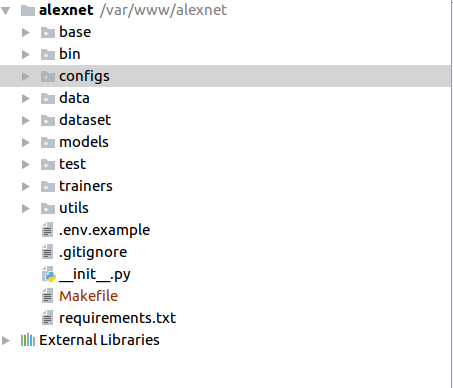
In the terminal, let’s do:
i) mkdir docs # This is the directory for saving the assets of documentation.
ii) cd /var/www/alexnet/
Sphinx comes with a script called sphinx-quickstart that sets up a source directory and creates a default conf.py with the most useful configuration values from a few questions it asks you. To use this, run:
iii) sphinx-quickstart
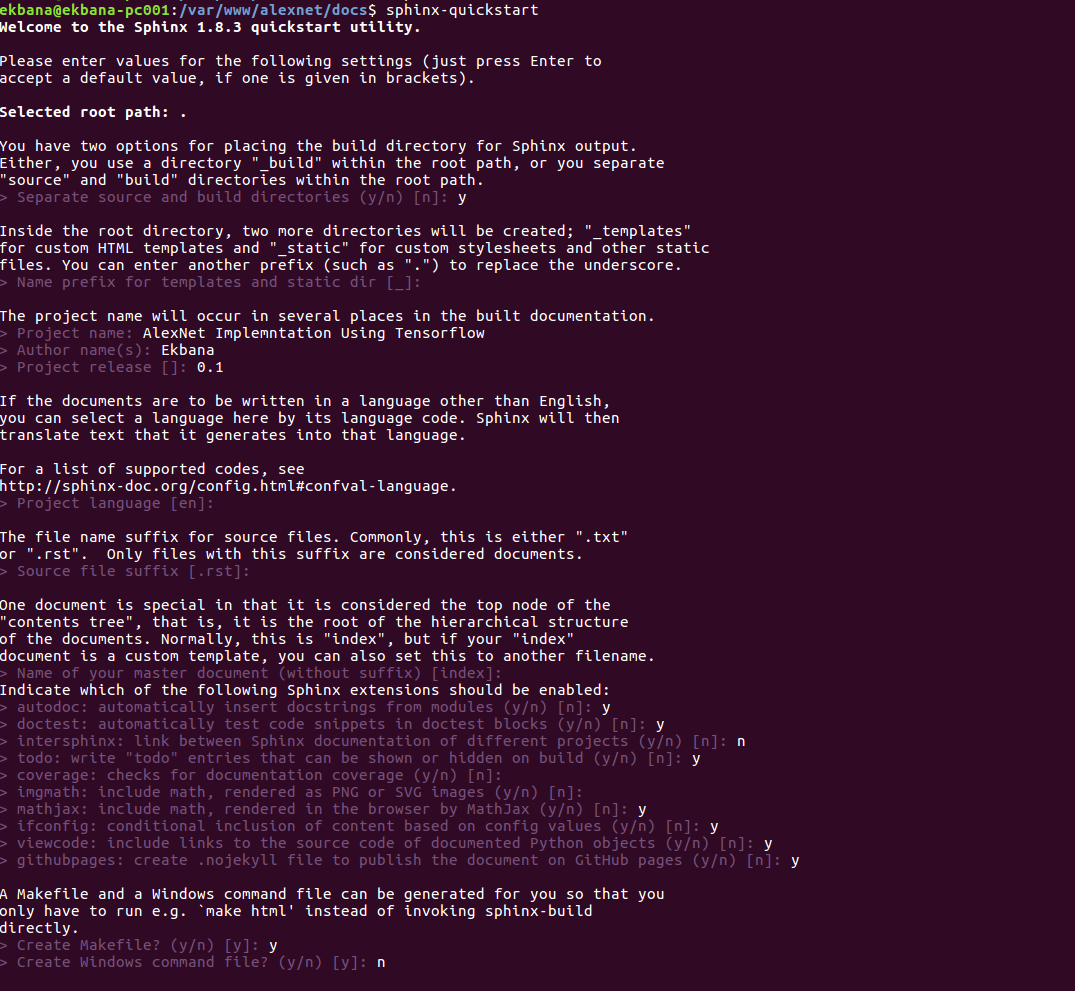 You will be prompted with the output like this:

Now if you look into the newly created docs folder you will see the new directories and files. Inside the docs/source/
directory, there is a file named conf.py, that contains all the configuration of the sphinx for this project.
From this point on we can actually proceed to generate the documentation. However since our docstring is formatted as
Google style docstring, we have to add the ‘sphinx.ext.napoleon’ in the extension list.
extensions = [
   'sphinx.ext.autodoc',
   'sphinx.ext.doctest',
   'sphinx.ext.todo',
   'sphinx.ext.mathjax',
   'sphinx.ext.ifconfig',
   'sphinx.ext.viewcode',
   'sphinx.ext.githubpages',
   'sphinx.ext.napoleon',
]
Important thing to note here is that, there is a file named index.rst in the same folder as of conf.py. By editing it,
we can actually modify, what we want to show in the index page. As of now, let’s leave it as it, and move to create the
documentation of each modules using sphinx’s autodoc extension.
To create the documentation of each module, we must import the path to the project so that all the modules could be
imported. Remember, Sphinx actually import the modules hence it executes the code as well.
You may want to put the unwanted codes to be place inside the __main__ block.
In conf.py, let’s import the path to our project which contains multiple modules.
import os
import sys
sys.path.insert(0, os.path.abspath('../../../'))
You can either uncomment these lines and edit the sys.path, or add these lines in the conf.py. Since our conf.py resides in the following structure:
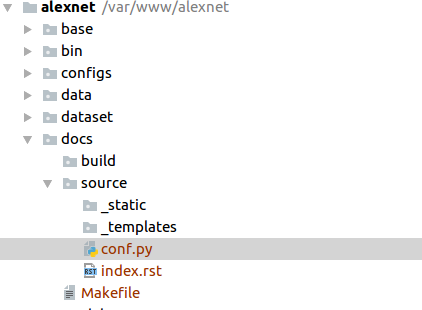
We have to go three step back in our directory structure from where we could actually import our modules
like alexnet.dataset.dataset.
Make sure each modules that you automatically want to documented has __init__.py files.
Now let’s run this command from the root directory of our project, in our case it’s var/www/alextnet .
sphinx-apidoc -o docs/source/ . [4]
Apidoc is needed when using external style like Google, Numpy, however for ReStructuredText, this is not needed.
This will add the moduleX.rst files where moduleX is your module name in the source directory of docs. One of the
file in our project looks something like this, however this will be different in your case depending upon, how your modules are named and structured.
alexnet.dataset package
=======================

Submodules
----------

alexnet.dataset.dataset module
------------------------------

.. automodule:: alexnet.dataset.dataset
   :members:
   :undoc-members:
   :show-inheritance:


Module contents
---------------

.. automodule:: alexnet.dataset
   :members:
   :undoc-members:
   :show-inheritance:
Let’s actually build the HTML documentation:
sphinx-build -b html docs/source/ docs/build/
Now you will see all the associated html files corresponding the modules rst file. If you open up the index.html inside the build folder, you will see something like this:
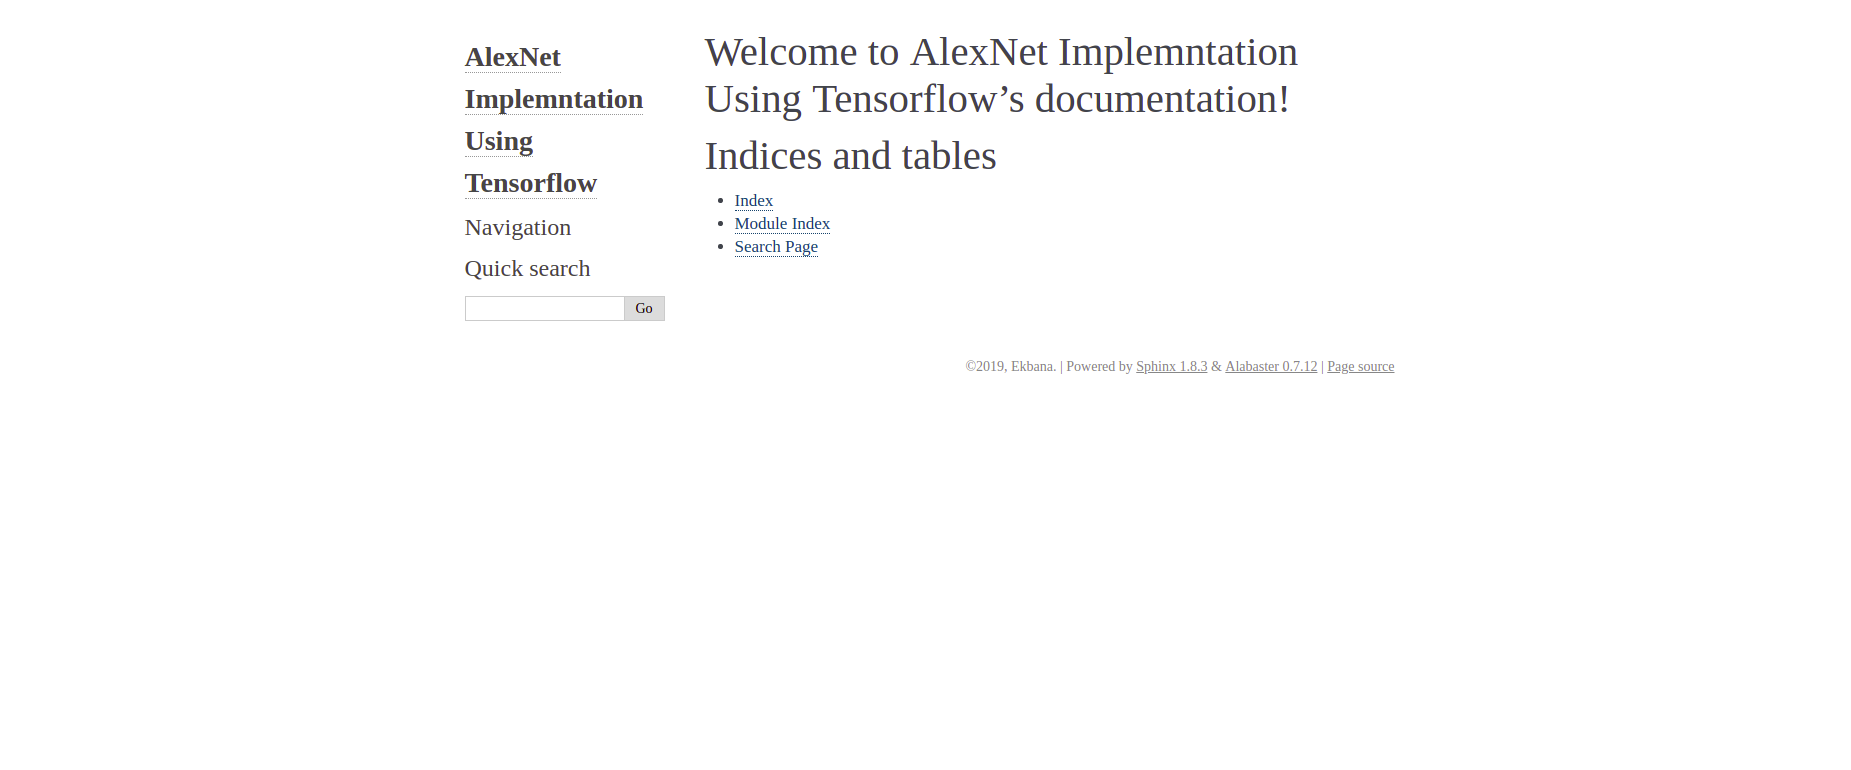
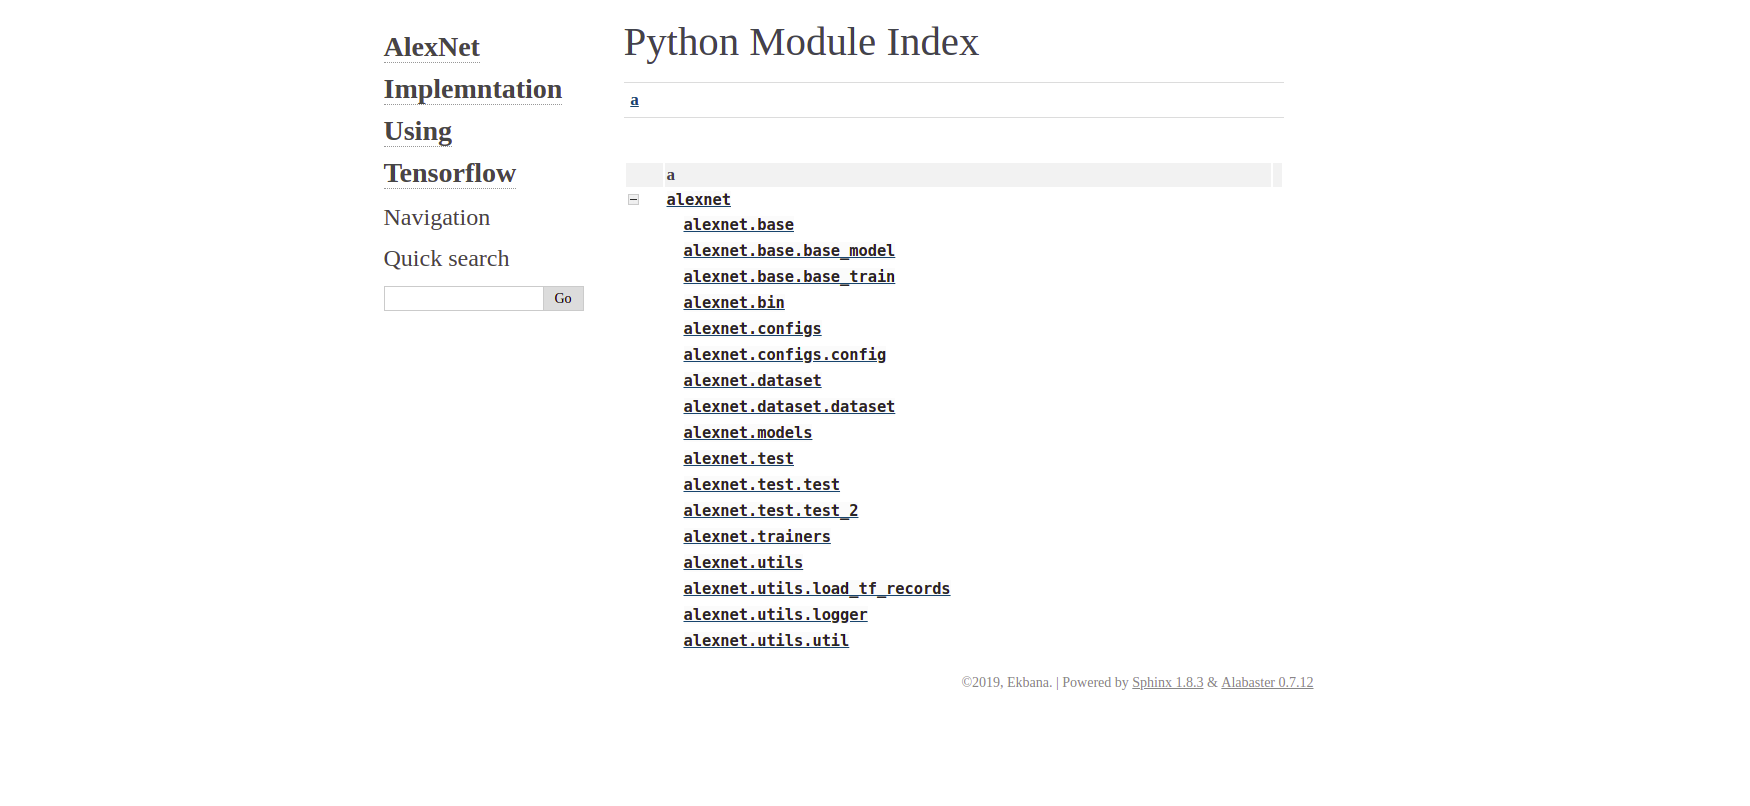
Now, click on the Module Index, you will see something like this, of course depending upon your code structure:
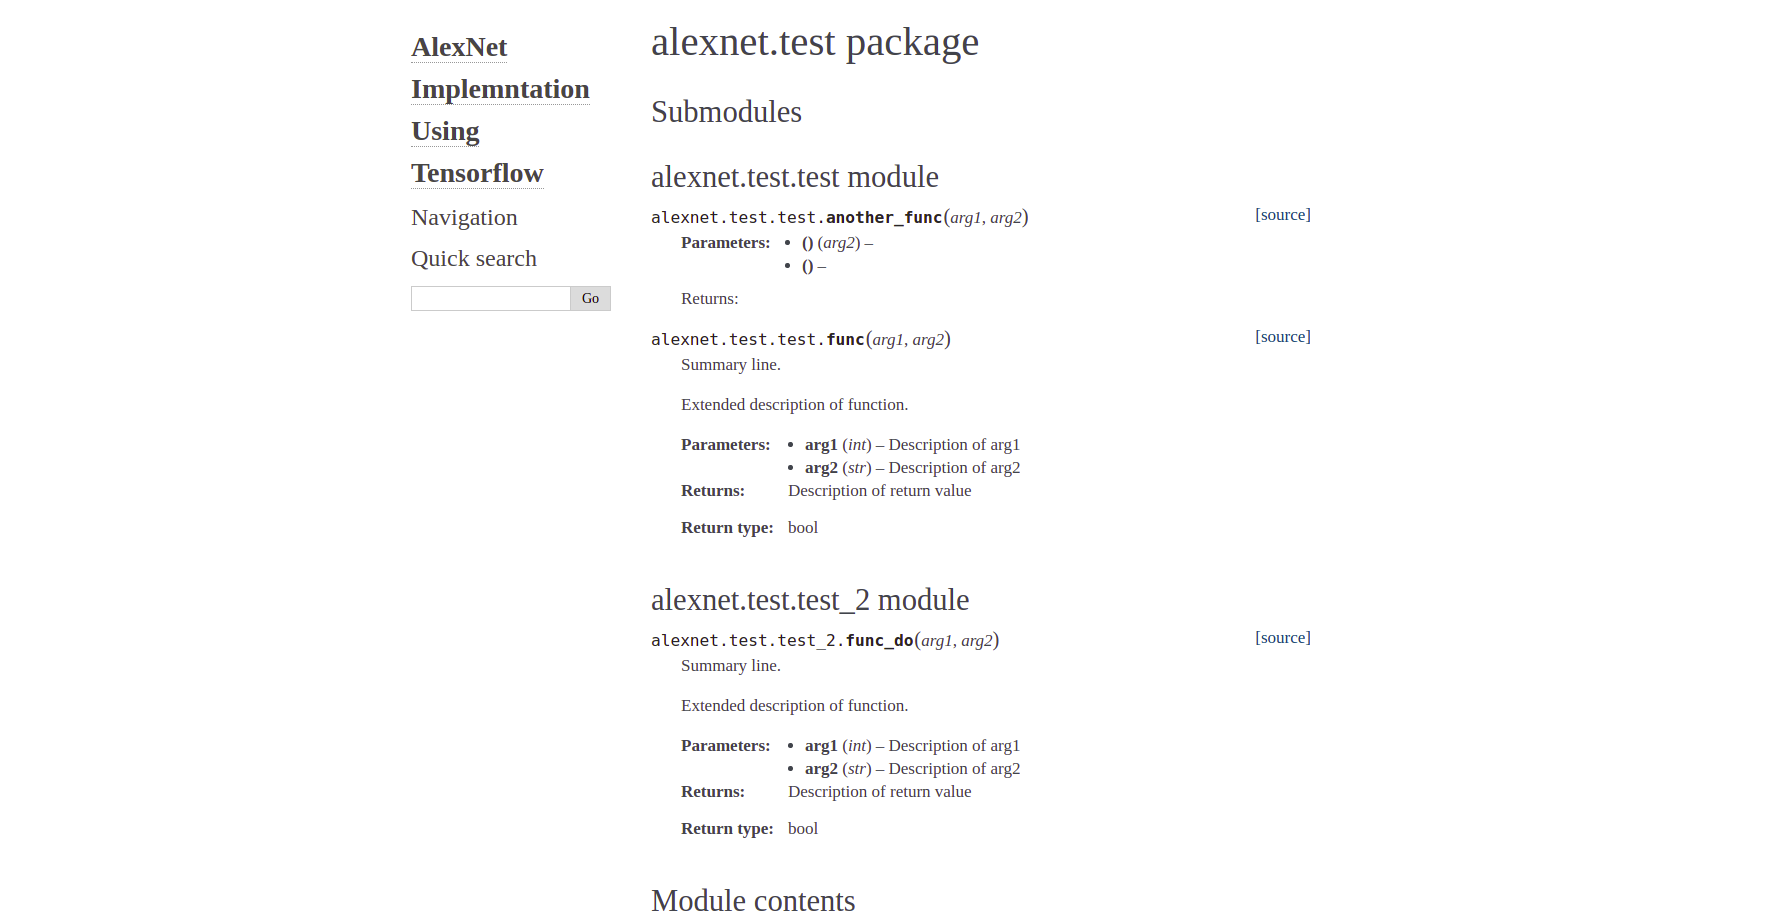
And finally like this, if you click on the module link:
From this point, you can actually play around with the various options provided by sphinx.

